
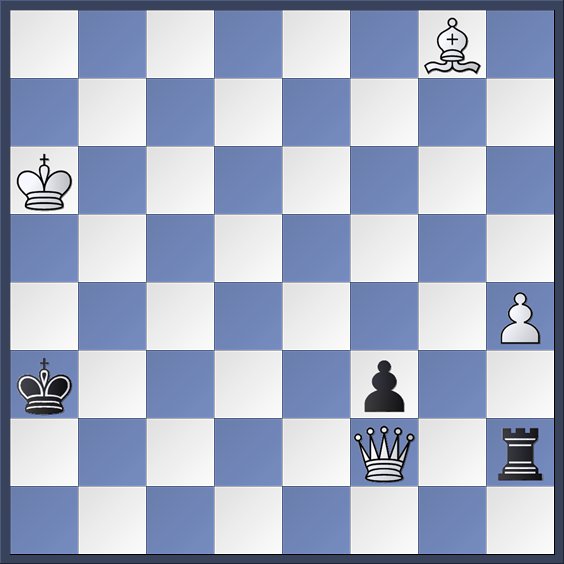
Our first two entries in this series featured complex play drawn out over a large number of moves. So, for a change of pace this week, let's try something lighter. This problem was composed by E. Pedersen in the early 1940s. White is to move and mate in three:
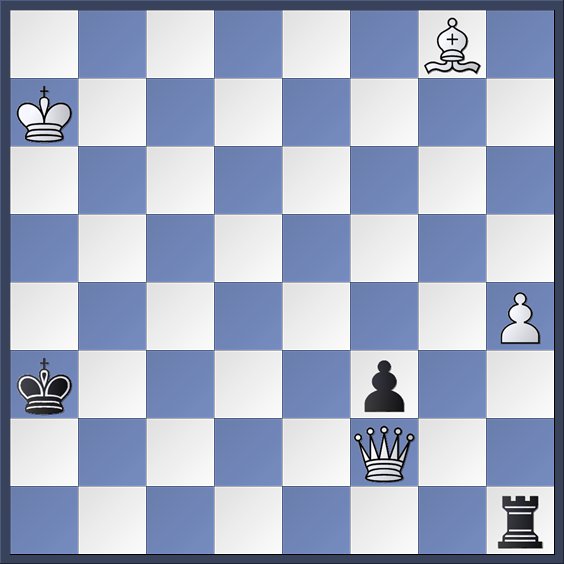
Remember that white is moving up the board and black is moving down. Vertical files are labeled a--h from left to right, while horizontal ranks are labeled 1--8 from bottom to top. So the white king and queen are on a7 and f2 respectively, while the black king and rook are on a3 and h1 respectively.
White's task appears daunting, since the few pieces he has are so far from the black king. Of course, were this a normal game of chess white would win easily. But that's not good enough. This is a problem, not a game, and if the stipulation requires mate in three that doesn't mean that four is OK too.
Interestingly, despite the reduced material, this position is another example of a “logical problem,” which we discussed last week. The idea is that white has a sequence of moves that appears to achieve his goal quickly. This is his “main plan.” But if he plays it immediately then black has an adequate defense. So white executes a “foreplan” whose sole purpose is to neutralize the defense. Then he can go play his main plan in peace.
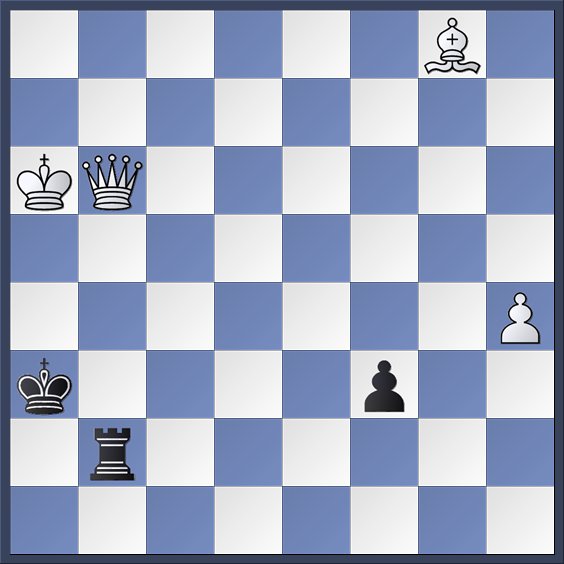
In this case, the main plan is to play 1. Qb6 which threatens the simple 2. Qb3 mate. Sadly, black has an adequate defense with 1. ... Rb1, bringing about this position:
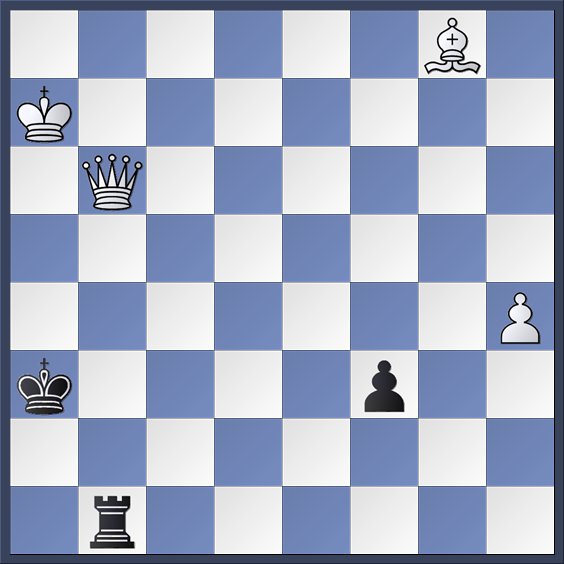
White will now require at least three more moves to give checkmate, which is too many. (As an aside, black could also have defended against white's threat with 1. ... Ka4, but then white would play 2. Ka6, and mate will be given on the next move either by 3. Qb3 or 3. Qa5, depending on what black does.
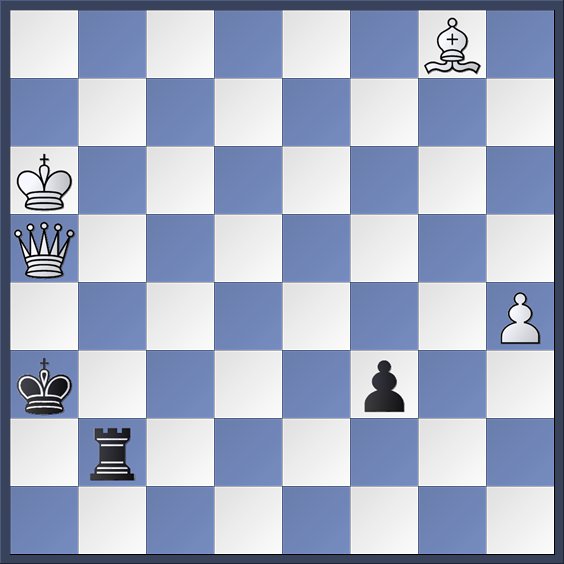
So white needs to neutralize black's Rb1 defense. This can be accomplished by the key move 1. Ka6!:
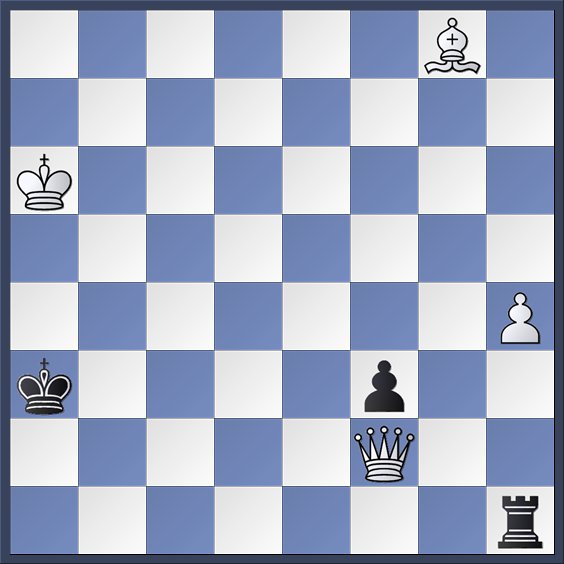
White's threat is not so easy to see. He is planning to play 2. Qa2+ Kb4 3. Qa5, which is a very pretty checkmate:
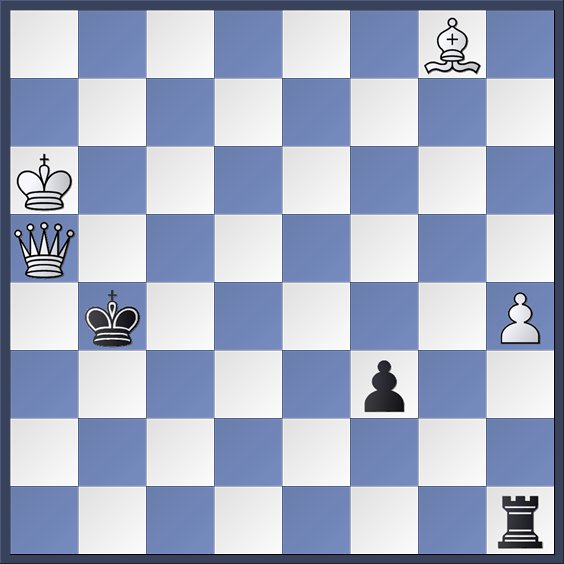
Even cooler is that if black defends with 1. ... Kb4, then he will still lose to 2. Qb2+ Kc5 3. Qb6 mate:

These two mating positions appear to hang in midair! It's also a nice touch that to achieve his goal, white must allow the king to move away from the edge of the board. This is counterintuitive, since the king appears to have more freedom in the middle.
But black isn't finished yet! He can defend with 1. ... Rh2:
Again, if this were just a regular game white would probably just take the rook and worry about checkmate later. That's not good enough for our present purposes, though. After black's defense, white can revert to his main plan with 2. Qb6. Black's only defense is to play 2. ... Rb2
Compare this diagram to the second one above. Previously, black had the perfectly adequate Rb1 defense. Now the rook has been decoyed to b2 instead. Do you see why that makes all the difference?
The reason is that on b2 the black rook blocks his own king. So white can now play 3. Qa5 mate:
This would not have worked before, since the black king could then have escaped to b2. An impressive amount of play for so few pieces!
Incidentally, this problem illustrates another nice problem motif. We have a situation in which black has an adequate defense to some threat. During the play, white forces black to abandon that defense and replace it with a new defense. But this new defense has a weakness that white can exploit. This scheme comes up in a lot of problems. Chess composers refer to is as a Roman.
Chess problem jargon can be formidable, but after you see enough examples it all starts to fall into place.
1. Ka6 Ra1 2. Ka4 Zugzwang
2. Ka5 not Ka4 of course.
Nice little one. Enjoyed the description. That position with the 2...Kc5 3. Qb6 mate really does look like a trapeze act. And kereng's pointing-out of the zugzwang adds a bit of flavor. Thx.
@kereng: Yes, that line is also a mate in 3: 1 Ka6 Ra1 2 Ka5 and Black must move the rook, allowing 3 Qa2++.
I was wondering how White would prevent Black moving the king after 1 ... Ra1 to check the White king, but that does the job.
@kereng,
Yes, that's all well and good if black responds with Ra1 after Ka6. However, Jason's analysis above indicates that Rh2 is the proper response. after Rh2, the Ka5 move will obviously be met with Rxf2 and all hope of white getting mate in 3 is gone (and likely mate in any number of moves as well).