
Want to make your own robot? You can do this the easy way, or you can do this the hard way. Or, both, if you like.
The basic home made robot is a robot because it moves around, and the way that is usually achieved is with two independently powered wheels, a third wheel (or something) to balance the thing, an energy source, some logic circuitry, some sensors, and some sort of remote control.
You can learn how all these technologies work, buy the various parts, put them together, program it, and have your own robot.
Or, you can just get one of these guys, and you're nearly done.
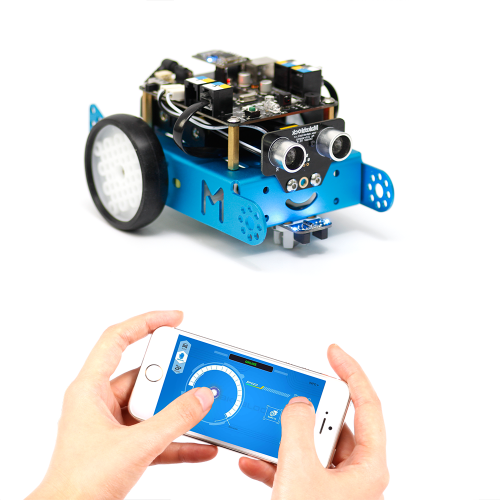 The robot comes with a simple remote, but you can install apps on smart phones that allow you to control the robot. The smart phone app offers a few features that the included remote leaves out, such as a super turbo mode, and the ability to control the robot by shaking your phone.
The Makeblock DIY mBot V1.1 Robot Kit is just under a hundred bucks, and is a fairly high functioning robot. You have to build it after you get it, but that takes something like 10 minutes. My brother Joe kindly sent one to Huxley, and Amanda and Huxley built it together in short order while I waited and watched, ready to jump in if needed. I was not needed. (Amanda is a scientist and Huxley is a gear head, so of course this was easy for them.)
One of the important features of the Makeblock Robot is that some of the key assembly needed to make a robot of this kind is either obviated by design (I'll 'splain in a minute) or made very easy with the use of handy dandy cables.
Normally, to make a robot like this, you'd start with a controller board such as the Arduino Uno . These boards have little thingies to which you attach wires, but they are lined up and organized in such a way that you can also attach a "shield" which consists of pre-fab circuitry to do a specific thing. One kind of shield is a motor control shield. Others facilitate infrared communication, or blue-ray communication.
The core of the the Makeblock Robot is Arduino circuitry already married to, and on the same board as, a motor control and an IR communication circuit. To this are added (by you) a couple of sensor boards and a blue-tooth board. The sensor and blue tooth boards are separate because you may want to swap out the sensors or comm devices that come with the robot, later, when you figure out how it all works and want to do more.
The motor control parts of the board attach to the motors with simple cables. All of it screws together to a chassis, which holds the controller, the brain, some of the sensors, and the wheels.
There is also programming built into the device, so it can do stuff right out of the box.
The robot comes with a small remote, which can be used to send motion commands, and some other fun commands, to the robot via an IR system (just like a TV remote). (If you build one, point your other remotes at the robot and see if you can get a rise out of it by trying different buttons!)
A second mode is "object avoidance mode." This can be initiated with an on board button, or via the remote. The robot has a sensor on the front that sends out an ultrasonic signal, and then receives it, using time to estimate, bat-like, how far the nearest object in front of it is.
As the robot approaches an object, it stops, and changes course.
This sensor system does not detect when the robot is at the top of the stairs. Repeat. This sensor system does not detect when the robot is at the top of the stairs.
A third mode is "line follow mode." This involves a pair of sensors at the front of the robot, facing downwards. These detect certain color contrasts, and in so doing, can determine if the robot is over a line, and if so, using some fairly simple (built in) programming, the robot follows the line. The kit comes with a big piece of paper with a black figure eight on it.
You can try to make your own lines, but you will find that your human senses are not the same as the robot senses, so what you think is a contrasting line may not be what the robot thinks is a contrasting line. So, experiment.
And, if you don't find the line following to be good enough as it is, buy a more sensitive sensor, and program the robot to follow lines using programming mode.
Or buy two robots, attach a ballon to each, on the other end, a balloon popper, and have robot wars in your house. Like this:
Or set the robot up to count time (an hour or two) and then drive around the house holding a giant feather for a while. The cat will like that. I'm pretty sure you can also get an IR sensor more sensitive than the one on board, or a motion sensor, so the robot can actually go and find the cat using body heat or motion. And so on and so forth.
This robot is sturdy, and if a part does break, you can get a replacement part inexpensively. The chassis is designed to attach all sorts of things to it. You can find parts that will interact with this system from the huge panoply of Arduino OpenSource hardware bits and pieces, or you can get add on kits designed to work with the Makebot Robot, including the Makeblock Me LED Matrix 8×16 for mBot robot kit, the Makeblock mBot Bracket Pack Aluminum Robot parts
, or the Makeblock Robotic Arm Add-on Pack
The mechanics of connecting together parts are said to interface or interact with Lego Technic.
Since this is an Arduino based device, the programming can be done in the native Arduino Language (called Sketch, a form of C). But MakeBlock provides MBlock, which is a form of Scratch. (I have two reviews of Scratch books here.) This form of scratch lets you use scratch like programming blocks, and the drag and drop elements, etc. but then translates the scratch program in to sketch. You can use this system in a cloud based form on any platform, and the offline editor currently works only in Windows and on a Mac. (It is possible to run it on Linux, according to what I've read, but I've not tried it yet.)
You don't have to know programming to build this robot and have fun with it, but a little bit of programming is easy to do, and this is perhaps one of the best ways for a kid to learn some hardware and some software skills.